I always wear face mask and take pocket tissue papers everywhere I go during hay fever season. When I go to the grocery shopping, I add face mask and soft tissue papers in my cart. However, it is hard to buy both of them this year because of COVID 19. Now these days, we can buy tissue papers here in Japan, but not face mask. So I decided to make my own face mask and using it everyday.
In the beginning, I was suspicious about handmade face mask. But it is really comfortable and working quite well for hay fever. When I was using disposable face mask, I felt itchy sometime. With handmade face mask, no itching. I think people who have sensitive skin will feel the same.
I share how I made my own face mask here. Please try it if you are curious. It is kind of difficult to buy face mask materials here in Japan now, so let’s be creative. Use something you see in your house.
Please download patterns and cut them out. Pattern A and Pattern B
* The size is about M
* Please make your own for smaller or larger size adding ±1cm
What we need:
Tightly woven cotton fabric, elastic, iron, marking pen, sewing equipments like sewing needles, scissors, thread, pins etc. Sewing machine if you have it.
The fabrics I’m using here are used Japanese tenugui (handkerchief) and mom’s old kimono. I’m using kimono for outside and tenugui for inside and filter. You can use used clothing, handkerchief, pillow case or bed sheets instead of tenugui and kimono.
Let’s see how to make it step by step.
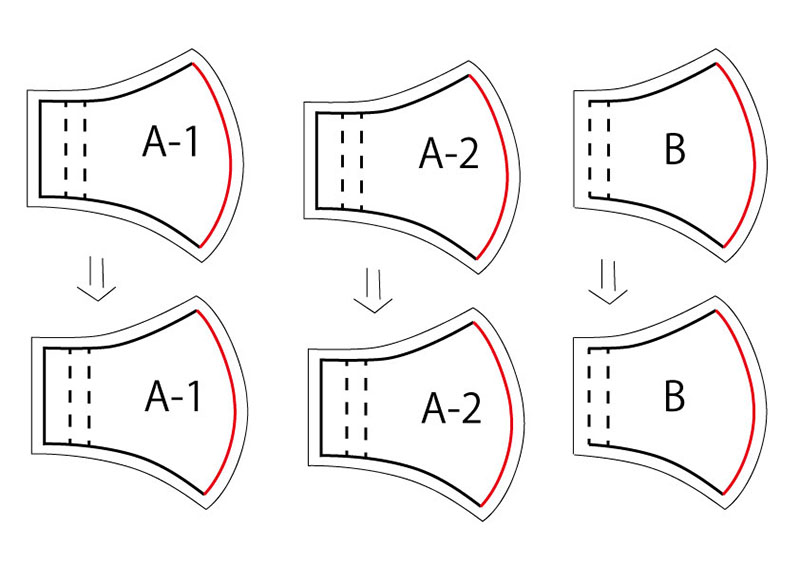
①Place your pattern onto fabric and trace it. You need 4 pieces of A and 2 pieces of B. B is the filter part. If you want to go with no filter mask, just prepare 4 pieces of A.

②Let’s cut the fabric. Please leave about 1cm from the line.

Now you have have pieces like the photo bellow.

③Take two pieces each and sew the curve side together. Red curves on the picture are where you sew.

④Make notches like the picture bellow.

⑤Iron each pieces and make a seam flat.

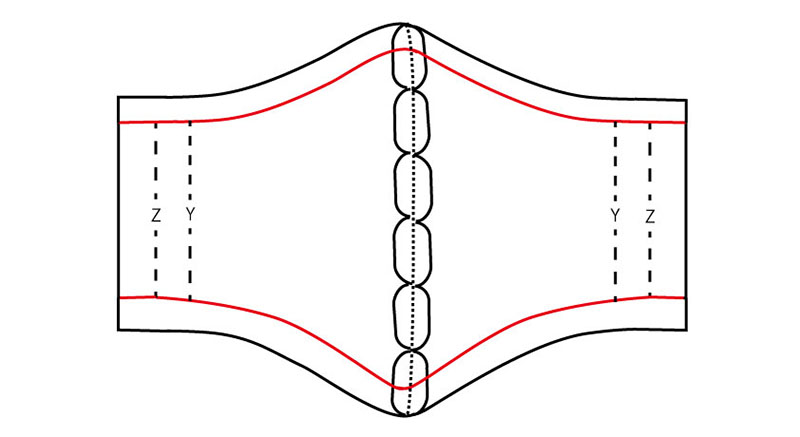
⑥Place “A-2” on the table seam side down, then put “A-1″ on “A-2″ seam side up, and then put “B” on top seam side down.

⑦Sew the red lines on the picture bellow.


This is only basting.
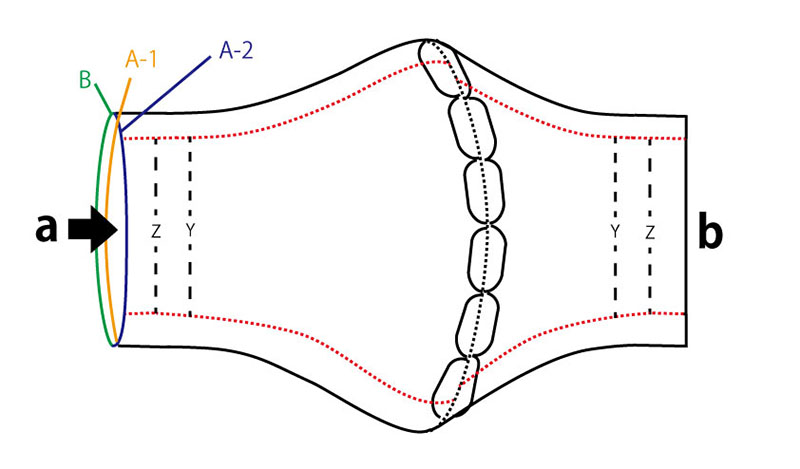
⑧Turn the mask inside out. Push “a” part through A-1 and A-2. Then pull “a” part through “b“.

⑨Iron stitching part carefully. Make it nice and smooth.
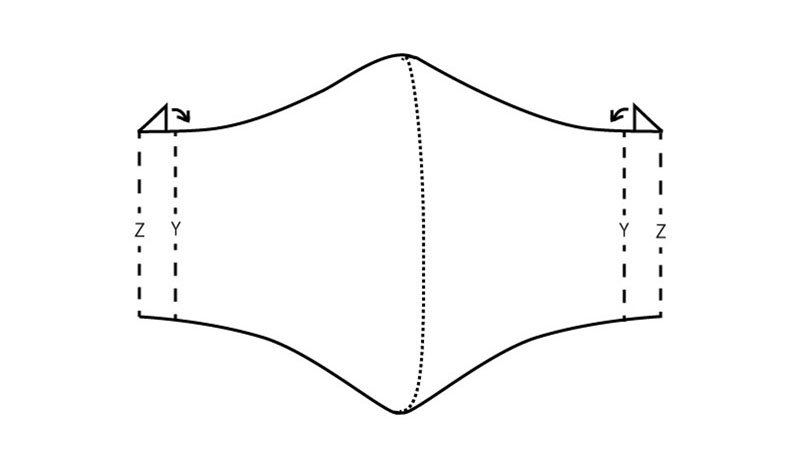
⑩Fold in the side edge of the mask at Z line on each side, and pin then stitch. Now you have two elastic pockets on either side.


⑪Thread the two pieces of elastic through the two elastic pockets of the mask.
Now you have your own handmade face mask.

If you cannot find any elastic, you can use shoe laces or any kinds of ribbons.It might take some time to make first one, but it won’t take that long to make second one.
COVID-19 has spread around the world. It is better to wear mask in public either you have hay fever or you don’t. It’s time to make your own mask at home. Stay safe, everyone!


Comments